BlueStacks Change IP Proxy Settings
BlueStacks is an Android emulator that can help users run Android applications on Windows or macOS. Using Bluestacks allows users to play games on a larger screen and use a keyboard and mouse to control the game. At the same time, using a proxy server that can provide faster network connection speeds, and improve the performance and responsiveness of the game application. Next, I will tell you how to configure
YiLu S5 proxy and BlueStacks change IP proxy settings.
1. Download BlueStacks Android emulator.
BlueStacks official website download URL:
https://www.bluestacks.com/download.html
Here I use a Windows 10 PC to install BlueStacks 5, then change BlueStacks IP proxy settings.
2. Download and install v2rayNG APP on BlueStacks.
Download v2rayNG Android APP:
https://github.com/2dust/v2rayNG/releases
3. Add a proxy configuration file.
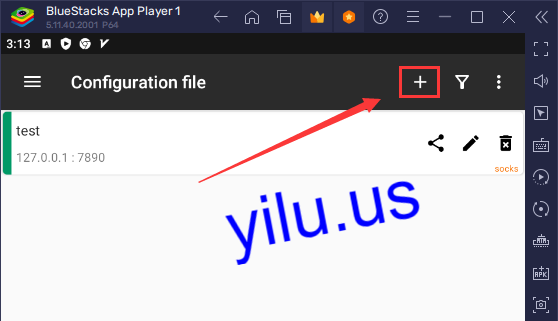
Open v2rayNG APP, and click “+” icon to add a proxy.
4. Select proxy type.
Select “Type manually[Socks]”
5. Enter proxy details.
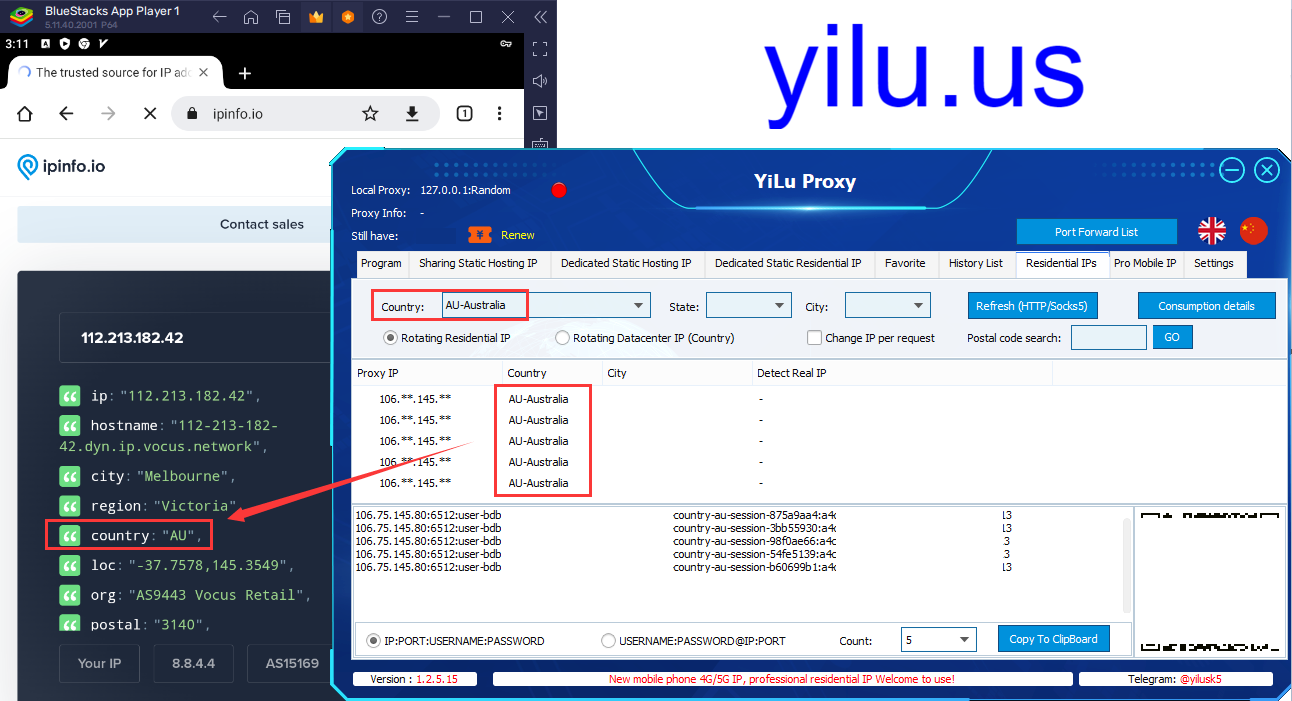
On the YiLu Proxy [Residential IPs] tab:
a. Select rotating residential IP;
b. Select the first IP information format;
c. Set the number of generating IPs;
d. Select a country, state, and city;
e. Refresh;
f. Copy an IP, port, username, and password.
On v2rayNG configuration file settings:
a. Enter a proxy remark;
b. Paste IP, port, username, and password;
c. Click “√” to save.
6. Use a proxy.
Select the added proxy, and click “v” icon on the bottom to connect the proxy network.
You can click the black area to test the proxy network speed.
7. Check the IP address.
Run the Google Chrome browser on BlueStacks Android emulator, and enter “ipinfo.io” to check the IP address. The IP location is consistent with the selected location in YiLu Proxy client.
Setting Details of Youtube Video about
BlueStacks Change IP Proxy Settings, please view:
The article is from
https://yilu.us/configuration/bluestacks-change-ip-proxy-settings


